Showing posts with label make. Show all posts

2 July 2013

The Ultimate Banana Cake Recipe


Vintage brown sugar tin ♡♥♡

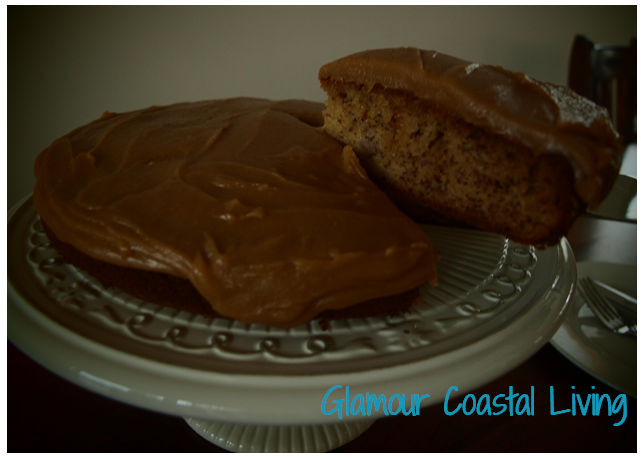
This recipe is a family favourite, passed down to me from my Mum and her older sister Lyn. Growing up, this was one of my favourites and never lasted long in my household, as it truly is the greatest! I always make this recipe when I have overripe bananas, as the trick to this recipe is to have that rich overripe banana taste!

Banana Cake Ingredients:
  • 125g butter (softened)
  • 3/4 cup firmly packed brown sugar
  • 2 eggs
  • 3 ripe bananas
  • 1 ½ cups self raising flour
  • 1 teaspoon bi-carb soda
  • 3/4 cup sour cream
  • 1 tablespoon milk
Method:
  1. Beat sugar and butter in a bowl with electric mixer until light and fluffy
  2. Beat in eggs, one at a time
  3. Mash bananas and then pour into the mixture, beat well
  4. Sift dry ingredients and then fold into the mixture alternatively with the sour cream and milk
  5. Pour into a greased tin (I use a round cake tin, approx. 20cm diameter by 7cm height)
  6. Bake in a moderate oven for approximately one hour
Icing Ingredients:
  • 60 grams of butter
  • 1 cup firmly packed brown sugar
  • 2 tablespoons of sour cream
  • 1½ cups sifted icing sugar
Method:
  1. Place butter and brown sugar into a small saucepan
  2. Stir over a low heat for 2 minutes
  3. Add sour cream and bring to the boil
  4. Remove saucepan from heat and then stir in sifted icing sugar until smooth
  5. Pour icing over cake and enjoy :)


I hope you enjoy this family favourite a much as I do! I would love to know how the recipe turns out for you :)

Enjoy Xx Ashlea

29 June 2013

Vertical herb garden & planter box

I would like to think I have a green thumb. But I don't. Well not with all plants anyway. Give me a palm or a tropical plant and I can make it grow, thrive and survive. Give me herbs to grow and they shrivel up and die. Instead of sacrificing a huge spot of our garden to a raised garden bed of herbs, I thought I would try my luck (again!), but doing it a little differently this time.

I have always loved gardens and admiring their shapes, forms and textures. My mums tropical garden was my inspiration when landscaping our new home in the recent months. She gave me many cuttings which are thriving and showed me how to keep them alive!

Mum's lush garden


28 June 2013

Protein Power Balls - recipe by The Kitchen Whisperer

I came across this recipe on The Kitchen Whisperer and think its the easiest and most tastiest protein power ball recipe! I even made them three times in the first week of getting my hands on this hot little recipe, my husband just couldn't get enough!! You must go and check out The Kitchen Whisperer website and the recipe here

Photo thanks to The Kitchen Whisperer


Ingredients

  • 1 cup quick oats
  • 3/4 cup peanut butter
  • 1/2 cup honey
  • 1/2 cup coconut shredded
  • 1/2 cup roasted sunflower seeds
  • 1/2 cup protein powder (I used Vanilla)
  • 1/2 cup mini dark chocolate chips
  • Additional items to roll them in: seeds, ground flax seed, mini chips, cocoa powder


Instructions


  1. Stir all ingredients together in a medium bowl until thoroughly mixed. Use your muscles here.
  2. When it gets too tough to stir with a spoon, use your clean hands.
  3. Chill in fridge for an hour.
  4. Once chilled, roll into 1” sized balls.
  5. At this point you can leave them naked or you can roll them in toppings (I used more shredded coconut to roll them in)
  6. Store in an airtight container and keep refrigerated for up to 1 week.


Notes

You can substitute in pretty much any healthy snack. If you don’t like peanut butter try a different nut butter.
You can use pretty much any dried fruit, nut, chips, grains (use rice cereal maybe).
Ground flax seed or wheat germ is awesome in this.
If you omit one dry ingredient you must put in another dry ingredient in this place.
If they feel a tad dry, add in more honey or peanut butter.
You don’t have to keep these in the fridge, but I prefer them cold.

You can also make these into bars but pressing them in a 9×13″ brownie lined tin.
Typical serving is 2 as a snack or post-workout treat


Photo thanks to The Kitchen Whisperer

Upcycling a gorgeous cane table


This gorgeous cane table is a sentimental to me and my family. We bought it off lovely family friends many years ago and for the last 12+ years it has been our lounge room coffee table and also outdoor side table! For the last few months it has resided at my brother's house and as he was moving this week and downsizing, I couldn't bear to part with it...

So you guessed it, I convinced my husband it was 'project worthy' and wouldn't take up too much time in the garage before it was upcycled and loved once more.  It didn't last more than 24 hours in the garage and last Sunday I commenced works on it. Its gloss coat had lost its shine and it had begun to weather, with mould and growth on it. So the first step was to lightly high pressure clean it, using a gerni. Once dried I then applied a white undercoat.
I am just letting the paint cure and hopefully can get its final paint coats on this weekend. Please stay tuned for its progress shots - I think its going to look just divine!


Thanks for stopping by, I look forward to sharing more projects and inspiration with you!

 Ashlea Xx
 

CONTACT/WORK WITH ME

ASHLEA KERR

Blogger, Creative + Business Owner

Gold Coast, Australia

Interested in working with me? Sounds fantastic, I love working with brands and creating fabulous content for my readers.

glamourcoastalliving@gmail.com

On Glamour Coastal Living