Each Christmas I love to give my family a homemade gift. Last year I made jam drops, from my Nanny's treasured recipe which you can see the recipe for here. This year I wanted something easy and a little naughty that everyone would love and it wouldn't take me hours to make. I settled on Rocky road - who doesn't love Rocky Road?! Here is the recipe I came across, courtesy of Not Quite Nigella.
Showing posts with label make. Show all posts
Showing posts with label make. Show all posts
27 December 2013
Jam Drop Biscuits


10 December 2013
Upcycle a wooden tray - an easy DIY project
I am tray obsessed at the moment!
I have upcycled two trays now, one for the coffee table and one for my bedroom. This is the one for my bedroom that I finished last week, it was super easy to upcycle and no power tools were required! I simply purchased this tray form Kmart for $10, added a little paint and voilà!

If you want to upcycle a tray and make it your own all you need is:
- A serving tray (can be purchased from discount stores or Kmart)
- A cut out pattern (I used a placemat from a discount store)
- Paint
-Sponge
- Tape
- Spraypaint

Firstly give the tray a light sand, then using a damp sponge apply a thin layer of paint. Let it dry completely before applying a second layer. Lightly sand and if needed, apply another coat of paint.
Then take your cut out pattern and center it on the tray. I used duct tape to fasten my placemat and also protect the edges of the tray from getting over spray on them.

Using a spray can, apply a layer of paint over the cut out pattern. Once completely dry, remove the cut out and if required, lightly sand. You may at this stage want to apply another layer of paint using the damp sponge, to give it a rustic, worn appearance.

Here is my completed tray. I am so thrilled with how it turned out!

What do you think?
Do you love how it turned out?

24 October 2013
My Succulent Gardens
.jpg)
If you know me, you know I just adore succulent plants.
They are so easy to grow, need minimal water, love light and are always producing new growths. What more could you want in a plant?!
I thought I would share with you some of the succulents growing at my home. I have vertical, terrarium and potted succulent gardens. I just had to add to share with you too, my gorgeous jade heart plant, which I have been growing for nearly four years now (you will see this below!).
If you are looking for some easy succulent garden ideas, you must look at these 800+ succulent gardens ideas on this Pinterest board. You can see some of my succulent loved shared here on my Pinterest board too.
.jpg)


.jpg)
Thanks for stopping by and sharing the succulent love!

8 October 2013
Tutorial Tuesday: Pallet Wall Art

You may have seen last week on my Instagram my new favourite piece of DIY in my home. You can check it out here. I have been eyeing off so many great pallet DIY tutorials on Pinterest that I am eager to try. Ever since I made my vertical garden and my pallet succulent frame I have been pallet obsessed - you can see both projects here.
My new task was some wall art to brighten up my hallway. Hardwood, timber oil and paint was all it needed - I am thrilled with how it has come up.
3 October 2013
Natural Protein Power balls

You may have read my previous recipe on Protein Power Balls here.
I came across a new recipe that is full of protein, but not from the powder supplements- from the natural ingredients of the recipe. It contains almond meal and tahini which are rich in protein and in particular tahini which is a richer protein source than milk, soya beans, sunflower seeds, and most nuts!
Best bit however - it only takes 5 minutes to make!!
30 September 2013
Upcycling glass jars
Easy DIY Shell Home Décor

I came across some cute glass jars months ago at my local home wares store for only a few dollars each. Not being able to turn down a bargain I purchased them and thought 'they will come in handy one day!'
Their day has finally come! I had a collection of sea shells that I wanted to display in my living room and thought that the glass jars were just perfect for the job. I then added a little twine, as I am obsessed with it and its versatility at the moment and Voilà - instant DIY home décor!
3 September 2013
My latest breakfast recipes you must try!
I have been having some fun in the kitchen lately, experimenting with some new recipes. I have never been a big fan of breakfast, so I have been trying to make effort to make breakfast enjoyable and filling. This is what has been on my breakfast table this week...
Yoghurt with walnut crunch and fruit salad
I came across this recipe and thought it was just too simple to not try and I was right, click here to see the super easy four ingredient recipe.


Fresh juice
I don't drink tea or coffee, so instead I love to have glass of juice each morning. However there is a lot of sugar and nasties in bottled juice, so this is a much better option. This is my favourite combination and is super easy as I always have the ingredients on hand. Simply juice 3 carrots, 3 apples and 1 whole lemon - Voilà, it tastes so good!

Strawberry and Almond muffins
I came across this recipe in the August Woolworths 'Fresh' magazine, they are super yummy and easy to make, click here for the recipe. The roasted strawberries in the middle really complete the recipe, learn how to make it here. I will use the roasted strawberry recipe again, it would be perfect over a tart or pancakes!


I would love to know if you have some success with these recipes. Do you have any breakfast recipes to share? I am always looking for new inspiration...
Xx Ashlea
Yoghurt with walnut crunch and fruit salad
I came across this recipe and thought it was just too simple to not try and I was right, click here to see the super easy four ingredient recipe.

Walnuts

Walnuts and oats roasting in the frying pan

The finished walnut crunch


Fresh juice
I don't drink tea or coffee, so instead I love to have glass of juice each morning. However there is a lot of sugar and nasties in bottled juice, so this is a much better option. This is my favourite combination and is super easy as I always have the ingredients on hand. Simply juice 3 carrots, 3 apples and 1 whole lemon - Voilà, it tastes so good!

Strawberry and Almond muffins
I came across this recipe in the August Woolworths 'Fresh' magazine, they are super yummy and easy to make, click here for the recipe. The roasted strawberries in the middle really complete the recipe, learn how to make it here. I will use the roasted strawberry recipe again, it would be perfect over a tart or pancakes!


I would love to know if you have some success with these recipes. Do you have any breakfast recipes to share? I am always looking for new inspiration...
Xx Ashlea
28 August 2013
Upcycling a small bookshelf

I finally had a day off today and was able to finish off a few projects that were in the 'yet to complete pile'. This was one of those. It is a little bookshelf that we had for many years when I was growing up. When I moved out of home I took it with me, using it as a shoe rack for many years. It had a hard life and was quite weathered, having homed my large collection of shoes. I always loved the style of it and couldn't part with it, so upcycling it and giving it a new lease of life was the answer.

Someone had given it a coat of paint on the top before. It sure had seen better days!
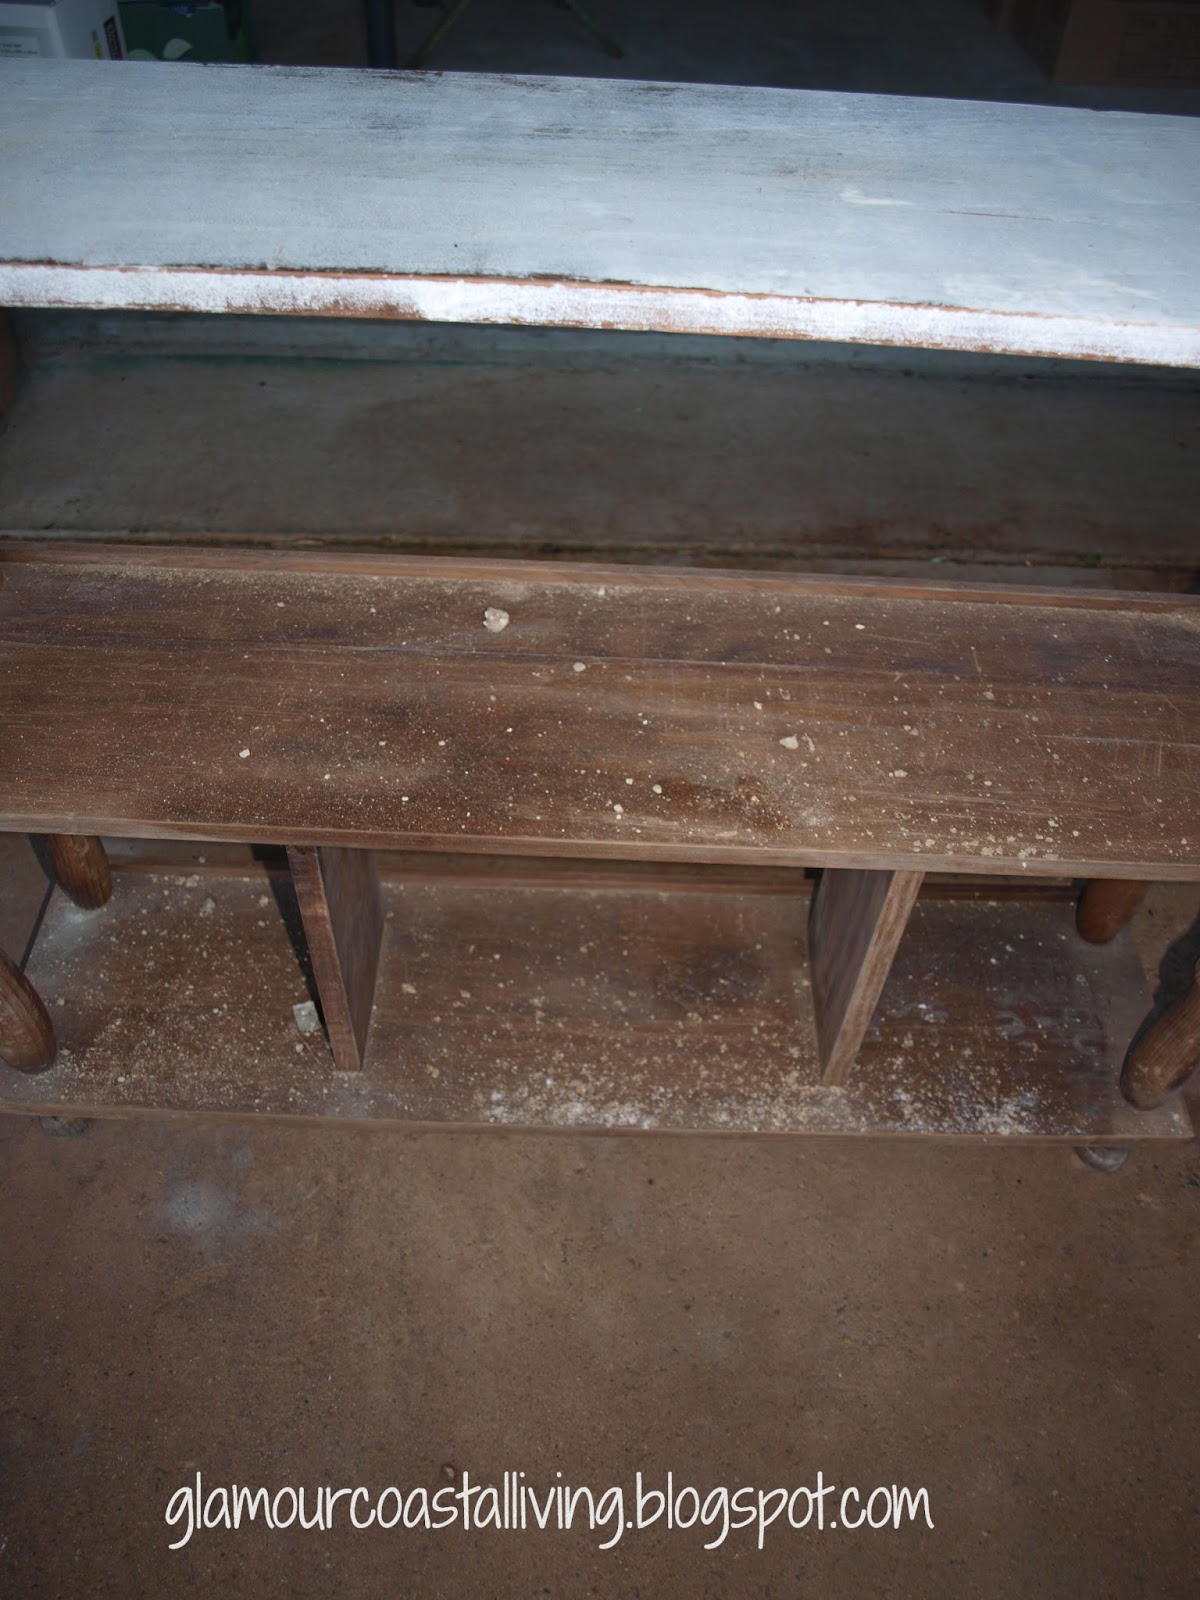
I sanded the timber back and gave painted it with white wash paint to give it that vintage, distressed look. It is the perfect size against my kitchen wall (the only vacant wall in the living area at the moment luckily!) and homes some of my precious nic-knacks.

I am so happy with the finish and am glad it can stay with me for a few more years!

Thanks for stopping by!
Xx Ashlea
17 August 2013
Lunch box ideas
What's in my lunchbox each day?
I am a foodie.
I love food and I love making it for others to enjoy.
I love a variety of food each day.
I hate sandwiches.
I hate wasting food.
I hate filling my lunchbox with plastic zip lock bags and cling wrap.
I hate spending money on purchasing lunch at work.
Okay that's enough about me.
So all the things above influenced me to look at lunch options and what's out there on the market. That's when I discovered bento boxes, is a Japanese word for food in a box. For me, the design of a bento box was brilliant - I was putting lots of containers, cling wrap, zip lock bags and lots of packaging in my lunchbox each day to take to work. I wanted a something that minimised all of this. There is lots of bento boxes on the market, however I opted for something that suited me more and the foods I take to work each day. So I settled on a Décor lunchbox which you can purchase at supermarkets for under $10.
For me, it works fabulously, not only am I saving on plastic, but I am saving money too, as instead of buying packaged food like little packets of handy sultanas I now buy a large bag and then fill the compartments in my lunchbox each day. Its also a lot of fun, coming up with the combinations and trying to add something slightly different than the day before.
Here are some of my lunchbox snack combinations and a little inspiration for yourself...
(apologies for the grainy photos, these are taken at 6am each morning on my Iphone!)


My lunchbox snacks typically feature, dried fruit, fresh fruit, vegetables, nuts or crackers. Alongside this as a main meal I will have leftovers, usually fish and vegetables, stir fry, fried rice, corn fritters, chicken salads, quiche or vegetable frittatas. Sometimes if I feel like adding something sweet I will add some banana cake, protein power balls or some yummy chocolate slice (simply click for the recipe links above!).
My husband must be the healthiest and most gourmet tradie on the jobsite each day, taking a lunchbox like this to work ;P But he loves it and so do I!
What's in your lunchbox each day?
Xx Ashlea
I am a foodie.
I love food and I love making it for others to enjoy.
I love a variety of food each day.
I hate sandwiches.
I hate wasting food.
I hate filling my lunchbox with plastic zip lock bags and cling wrap.
I hate spending money on purchasing lunch at work.
Okay that's enough about me.
So all the things above influenced me to look at lunch options and what's out there on the market. That's when I discovered bento boxes, is a Japanese word for food in a box. For me, the design of a bento box was brilliant - I was putting lots of containers, cling wrap, zip lock bags and lots of packaging in my lunchbox each day to take to work. I wanted a something that minimised all of this. There is lots of bento boxes on the market, however I opted for something that suited me more and the foods I take to work each day. So I settled on a Décor lunchbox which you can purchase at supermarkets for under $10.
 |
| {source} A traditional Bento box |
For me, it works fabulously, not only am I saving on plastic, but I am saving money too, as instead of buying packaged food like little packets of handy sultanas I now buy a large bag and then fill the compartments in my lunchbox each day. Its also a lot of fun, coming up with the combinations and trying to add something slightly different than the day before.
Here are some of my lunchbox snack combinations and a little inspiration for yourself...
(apologies for the grainy photos, these are taken at 6am each morning on my Iphone!)


My husband must be the healthiest and most gourmet tradie on the jobsite each day, taking a lunchbox like this to work ;P But he loves it and so do I!
What's in your lunchbox each day?
Xx Ashlea
10 August 2013
Easy Corn Fritters
There are many corn fritter recipes out there - for me this one is one of my favourites and is super quick and easy to make. This recipe is from Lifestylefood.com thanks to Bill Granger. They are great for lunch the next day served with some salad greens, or just on their own!


Corn Fritter Ingredients:
Avocado Salsa Ingredients (optional):


Corn Fritter Ingredients:
- 525g fresh corn kernels cut from 3 large corn cobs
- 1 small red onion
- 15 g chopped coriander leaves
- Sea salt
- Freshly ground black pepper
- Vegetable oil for frying
- Avocado salsa to serve
- Place 2 cups of the corn kernels and the onion, eggs, coriander, flour, baking powder, salt and pepper in a food processor and process until combined.
- Place in a large bowl, add the remaining corn and stir to combine.
- Heat 1 tablespoon of the vegetable oil in a non-stick frying pan over a medium to high heat.
- When the oil is hot, drop 2 heaped tablespoons of mixture per sweet corn cake into the pan and cook in batches of three for 1 minute each side.
- Drain on paper towels and serve with the avocado salsa.
Avocado Salsa Ingredients (optional):
- 2 ripe avocadoes, stones removed and diced
- 15g coriander leaves
- 2 tablespoons of lemon or lime juice
- 2 tablespoons finely chopped spring onions
- 1 tomato quartered, seeded and diced
- 1 dash tabasco sauce (optional)
- Sea salt
- Freshly ground pepper
- Place all the ingredients in a bowl and stir very gently to combine.
16 July 2013
Chocolate Crunch Slice
Chocolate Crunch Slice
(So yummy you will be going for seconds!)

This recipe was one of my Nanna's recipes. I think it was one of her 'just in case I get visitors' speciality that she always had on hand. I can still remember her Tupperware slice container that all her yummy creations were kept in. This one is super easy and ingredients that you will easily have on hand in your kitchen. I hope you enjoy :)
Ingredients:
1 Cup Self raising flour
1 Cup Brown sugar
1 Cup Coconut
1 Tablespoon Cocoa
125 Grams butter
Method:
1.
Mix dry ingredients together in a large mixing
bowl.
2.
Melt butter.
3.
Pour butter over dry ingredients.
4.
Spread mixture into a greased slice tin.
5.
Bake in a moderate oven for 20 minutes.
6. Remove from oven and allow to cool until warm.

Icing
Ingredients:
½ Packet milk cooking chocolate
1 Tablespoon Copha
Method:
1.
Place chopped chocolate and copha into a
microwave dish.
2.
Microwave for 1 minute. Remove and stir,
microwaving in 20 second intervals until melted.
3.
Pour over slice and refrigerate for one hour.
4.
Remove from refrigerator and cut whilst still
soft.
5.
Store in refrigerator in a sealed container.
6.
Enjoy!!
** Optional - I like to sprinkle some shredded coconut on the top when the icing is setting.

8 July 2013
Cane Coffee Table
A few weeks ago I posted about a gorgeous cane coffee table that I was in the process of painting and upcycling. You can read about it here. I finally finished the project on the weekend and wanted to share with you the progress photos - so let me know what you think!
I used a gloss white paint and am really happy with the outcome - my purpose was to give the table a new lease on life and I think that's exactly what I achieved! The table has been in the family for many years and I think it will now stay in the family for many more...
Thanks for stopping by, I look forward to sharing more projects and inspiration with you!
Ashlea Xx
 |
| A before photo |
 |
| A before photo |

 |
| An after photo |


